Headless M8 is the cool kids gateway drug
01 Jun, 2026
Try a M8, it's life-changing!
The Dirtywave M8 is undoubtedly one of the most advanced pieces of music production technology out there. Spawned by the brilliant mind of Timothy Lamb aka Trash80, it leverages on more than two decades of legacy provided by the LSDJ interface, re-adapted for a modern tracker with tons and tons of features running on a surprisingly powerful ARM microcontroller.
This post is a reference guide for people who are interested in obtaining a headless M8 for trying it out, understanding its capabilities, in the hope to remove an accessibility barrier, encouraging potential users to try out the instrument, get engaged with it, understanding the limitations and so on.
As a disclaimer, the author of the post is the owner of an original M:01 unit and encourages every reader and long-term user to purchase an original unit. The rationale behind this post is to spread knowledge and allow people to try things out rather than blindly purchasing something they might regret.
Purchasing list
- A Trimui Brick (the host device)
- A Teensy 4.1 (no pins)
- An SD Card from the suggested SD Cards list (more on that later)
- A generic SD card of at least 16 GB
- A USB-micro to USB-C cable (optional but recommended, for properly testing)
- A bare USB C male connector
- Some thermal paste (the regular computer stuff)
- A small copper pad
Trimui Brick
The Trimui Brick is an excellent modern handheld for a variety of reasons:
- Form factor and size are great: it's around a pocketable size, really handy.
- Construction quality is great and feels premium comparing it to many other devices in the same price category. Feels very solid.
- Specs are well-balanced: it proves exceptional as a GBC/GBA machine and also for many PSX titles. etc. etc. If you're more interested on the techincal specs there's some good reviews out there.
The Trimui Brick "Hammer" is a slightly improved version which mostly gives a premium feel by switching the plastic build for a metal case.
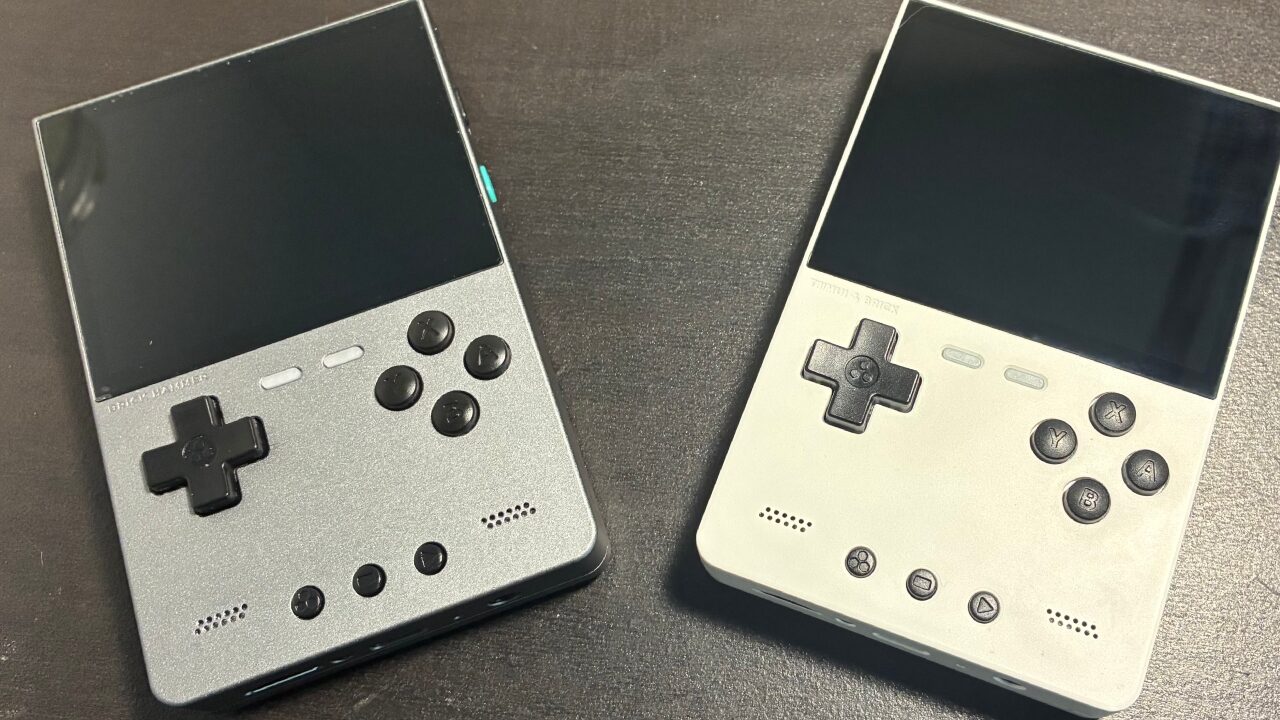
Note that other devices can be used:
- R36S
- RG35 series
- Basically any android-based device
- Probably many others
but my suggestion is to go with the Trimui Brick because it's so handy, compact and proven to work properly.
Where to buy
I source these consoles from Aliexpress. They usually have stores with local storage (e.g. local to Europe) so shipment is actually quite fast.
Teensy 4.1
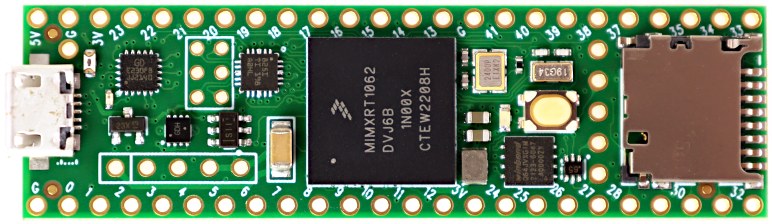
The M8 runs on a microcontroller platform in a development board, the Teensy 4.1. The idea is this:
- The Teensy is flashed with the M8 firmware.
- The Teensy connected via USB through a host device, gets power and streams/receives:
- The audio output (basically acts as a sound card)
- The display output
- The input commands
- MIDI data
This way your host device (in this case, the Brick), acts as a simple controller in a seamless way so that it actually seems that you're making music with the Brick itself. Actually, it's the Teensy inside that is doing all the heavy lifting.
Ideally you should search for and buy the TEENSY41_NE (version WITHOUT pins). The version with pins will not only cost more but the pins do not make it adequate for mounting it in a 3d printed case. The ethernet chip version is simply not needed, but can be accepted.
The firmware for the so-called "headless" M8 (as in, without the original I/O hardware) is available on the same github repository as the original firmware. Please be aware that you should only deal with the headless version of the firmware!
Where to buy
If you're in America, buy directly from SparkFun. If in Europe, you can search some resellers, e.g. Mouser, Conrad, RS, Digikey, or Amazon as a last resource. At the moment of me writing this the best price is on Digikey at 30€ (VAT included, shipping excluded) or 32€ (with the Ethernet chip).
How to setup the Teensy
There's a great official guide by Dirtywave on this topic. Please follow this, it's certainly much better than me repeating the same things over and over. Note: you're probably interested mostly in Step 1 and Step 2, while Step 3 is useful more as verification.
SD Card
It's actually an important step to choose the appropriate SD card. There's also a dedicated [official guide for SD card selection](https://dirtywave.com/pages/recommended-microsd-cards). The M8 is able to perform sample stremaing for disk, so non-contiguous read speed is a quite important metric. The M8 will actually fail to run properly in case you're using an SD card with poor read speed and a song that is sample-heavy.
Personally I own a Kingston Canvas GO Plus 128 GB (top of the recommended list). Previously I owned a 32 GB Sandisk Ultra. Depending on how much you want to use samples, you might actually be able to work with even smaller cards, as the M8 save and instrument format themselves are very very small and space efficient.
Software
Use Balena Etcher to flash the Trimui Brick/Hammer distro of Knulli onto a generic SD Card (note: NOT REFERRING to the SD Card for the M8! This is a generic ass SD card for your Trimui Brick).
After flashing is done, insert the Micro SD in the Brick for the first time and let it unzip / install / load properly.
After that is done, update your settings to reduce light and overheating (as mentioned in Thermals). Press Start and find the option to Install PortMaster.
After the installation is completed, put the SD card back in the computer, go to "roms/ports" and insert these files.
Now, boot up again the Brick and go to "Ports". Open "m8c". You should see something like this:

Now, connect the Teensy via USB-micro-to-USB-C cable (if you have it) to the M8 and the Teensy respectively. You should see that the M8C responds by showing you an empty tracker screen. Success!

3d printed case
You'll need a 3d printed enclosure to keep the teensy attached to your console. There's more than a single approach to this and you may actually DIY one model yourself.
- Slim Case
- Metro Grade Case <- recommended
- Other cases non-specific for the Trimui Brick
- For example, this one
In my experience I have tried the Metro Grade one and the good thing about it is that you will be able to install a usb hub with some usb c ports in there in order to connect it to USB MIDI devices. More on that later.
Thermals
As part of my personal experience, the Teensy is going to pull some current that makes it run quite hot. This can cause the device to freeze during overheating situations. My recommendations:
- Underclock the Brick from the settings. You don't need a fast Brick unless you're actually gaming, which you're not.
- Turn off the optional LED functionalities
- Try to reduce the screen brightness as much as possible
- Highly Recommended: Install a copper pad by applying thermal paste on the Teensy central microcontroller itself, putting it on top and letting it rest for some hours. Picture is just a reference. What you actually need is a flat thermal pad.
- The console may still experience overheating during charging but in my experience it does not crash/glitch when on battery, provided with the settings above and the heatsink installation.
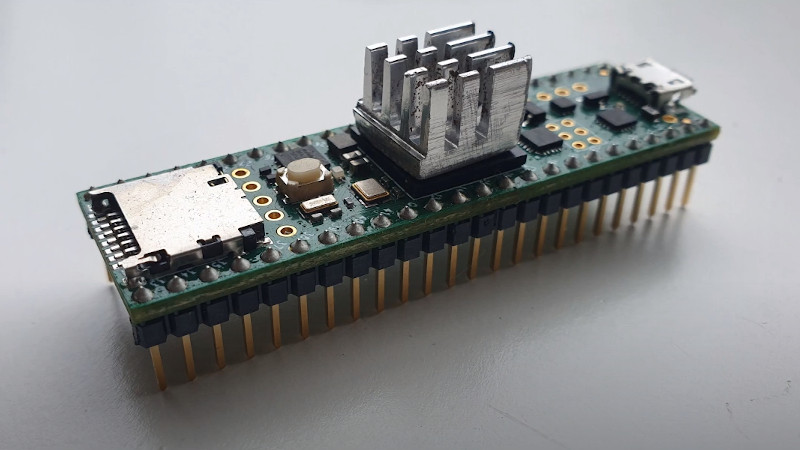

I suggest the 15x15mm format, below 1mm of thickness (ideally 0.5mm) otherwise you won't be able to make it fit.
USB MIDI connection
TBW
USB C Bare connector
Find them on Aliexpress, just by searching "USB C Connector". Buy the male one!
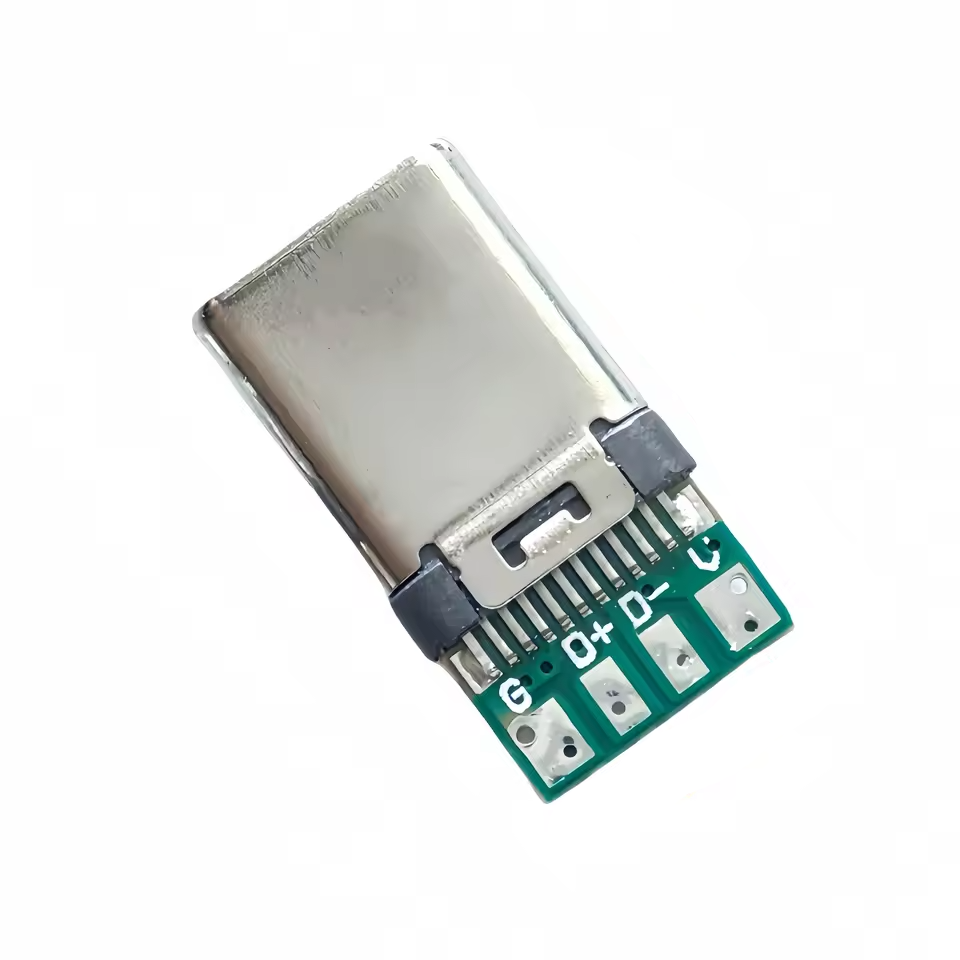
You will need to solder these to some cables to connect to your Teensy. This is the tricky part.
See build guide here:
Note: the video guide shows how to solder including all the USB C connectors. If you don't want to go with MIDI devices you won't need a USB hub and additional USB C connectors so simply don't bother doing that. You'll just need to solder:
- the GND of the teensy to the GND of the USB C connector,
- the D+ of the Teensy to the D+ of the USB C connector,
- the D- of the Teensy to the D- of the USB C connector,
- the 5V of the Teensy to the 5V of the USB C connector.
Make sure you'll be able to fit the cables inside the case before you actually solder them. Once you're done soldering, you can unscrew the Brick case, remove the backplate (make sure you're delicate because you're going to disconnect some pins from the back whilst doing that.
With the Metro case, you'll have to remove the back buttons, losing them in the process. That's expected.
Plug the USB C connector, screw the M8 in place and proceed to assemble the unit back together. You're good to go!
